Search This Blog

Saturday, September 28, 2013

60th Easel Birthday Card For the Best Mum!

This card is a special card I made for my mums 60th birthday.  It is a 5.5"x 5.5" easel card. I used a cream coloured card base and a fair few layers .
On the front of the cars i layered a 5x5" piece of patterned paper which had a beautiful design of a cherry blossom which i covered the branches with glitter glue to give it an extra sparkle and the cherry blossoms I covered with glossy accents to give them shine and dimension. I made sure to position this image to the right of the card front, I also place a white and slightly holographic butterfly sticker just below the cherry blossom image, and stamped my sentiment to the left of the sticker.  


 The number 60 for the card was just some pre cut thin cardboard numbers which I had purchased in a packet from my local craft shop,  I coloured the numbers with some pink pigment ink and then I embossed them both with some glitter embossing powder.
 To complete the front portion of the card i sponged the edge with a turquoise colour ink, and because the card base I used was cream it gave it a slight greenish quality.
 
 As this is an easel card I needed to create a part of the card so that it would hold up the front panel of the card, in order for it to stand up on its own to be displayed.  

To do this I created two panels which I layered on top of each other one measuring 5.5x 2.5" which I coloured with pink ink to match with the numbers on the front , I also punched out a scalloped border placed some pink gem stoned on each scallop loop and on the far ends I placed felt flower stickers which would also help to keep the front panel in place.  
The second layer measuring 5x2.25", I coloured turquoise, stamped and embossed my sentiment and also punched out a border on the top using the fiskars lace punch, I also placed another glittery butterfly sticker to the left of the sentiment, and that's pretty much the card ;)
Side view


Friday, September 27, 2013

A Card For My Dad... "PAPA" = )

I started out with a white card base here, as this card was for my dad (papa in Italian) and his favourite colour is light blue I placed a piece of blue card stock in the background and a scalloped blue border along the bottom.  The main portion of the front of the card was a white piece of card stock the I coloured with some blue ink, blending it with a sponge so that it would have a subtle and soft appearance, on the corners of this piece I also placed some silver photo corners.  Before attaching it to  the card base I stamped some sentiments in different shades of blue, placed a blue ribbon along the middle of the card piece and attached this ribbon with some staples and epoxy stickers spelling 'papa'


Retro Style Male Birthday Card

Background on this card is embossed with a fiskars texture plate (basket-weave) which once I panted it with silver paint looked to me like the pattern on certain car pedals, which is what gave me  the idea of going along with the car theme


The middle of this particular card base had an oval window, however I backed it with a black piece of card which I had painted with more silver paint in a linear pattern

Here I show the dimension of the epoxy stickers I used

Inside the card I've stamped a few birthday sentiments and have added the same ribbon which I used on the outer of the card


Monday, April 22, 2013

New Baby Girl Card


 I've used a cream colour base for this card, and placed a chequered pink layer of card stock onto the base card.  Before adhering the pink layer, I made a scalloped border for the opening side of the card, which is also a lighter pink with polka dots.  I've placed a pink square frame in the middle of the card, which has slight dimension and texture to it.  In the middle of the frame I've placed a chipboard embellishment on pop dots to give it some more dimension.  For the border of this card  I've used some soft pink grosgrain ribbon and finished three corners off with a pink laced button.  In the last corner I die cut a flower shaped base and a circle die cut to fit into the flower base.  The circle die cut piece is stamped with a pink pigment ink and a little bling decorates the centre of the stamped flower.


Saturday, April 20, 2013

Baby Boy Card


 Blue and green themed card for the arrival of a baby boy named Louis......I have used a few different textures on this card, from the paper and the alphas used to some embossing and epoxy sticker.


 Some close ups of the front of the card where I've incorporated some stamping in green pigment ink and set it with clear embossing to give it a shiny raised look.  The alphas have been placed on some punched out circle glitter paper to give that extra sparkle to the card.  To balance the new arrival circle which is popped up on some dimensionals  i have added a green button brad to keep the coloured theme consistent. 


 A green ribbon placed in the centre and a blue epoxy baby elephant sticker, some green bling and we've got ourselves a card =)


Thursday, April 11, 2013

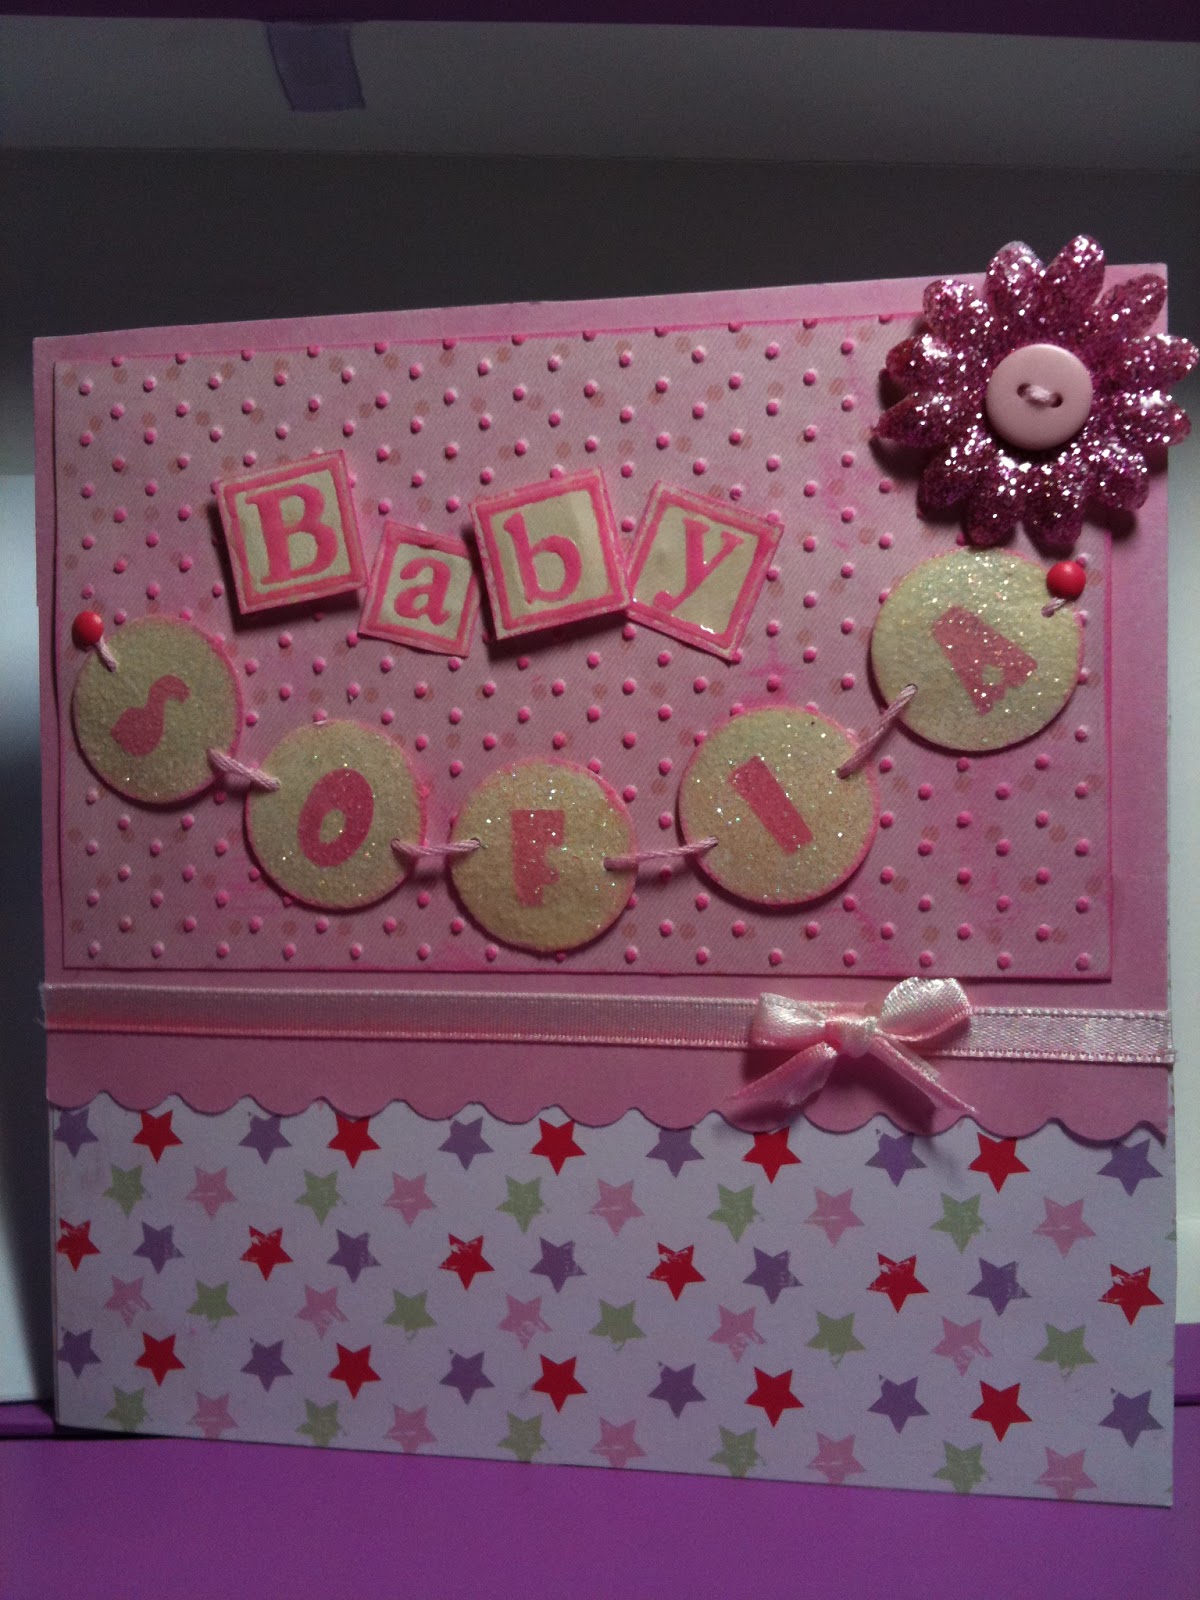
Baby Girl Card

 
              Individualised card for a baby girl... Using several pink shades.
Some dry and heat embossing has been used for the front of the card and also for the handmade glittered flower. 

Closer look at the handmade glittered flower- I used a fabric flower base i placed some versa mark to ad hear some Utee and alternated between layers of Utee and pink glitter.
Clear embossing over the baby lettering and holographic embossing over the name for added sparkle!
 
Inside of card

Finished the card with a simple side bow...
Dimension but not too bulky...

Sunday, October 21, 2012

Male Birthday Cards


-- Some fussy cutting, embossing powder and some birthday stamps and you've got yourself a card!--

 *********************************************************************


 *********************************************************************

Using my eCraft i let IT do the fussy cutting! =)